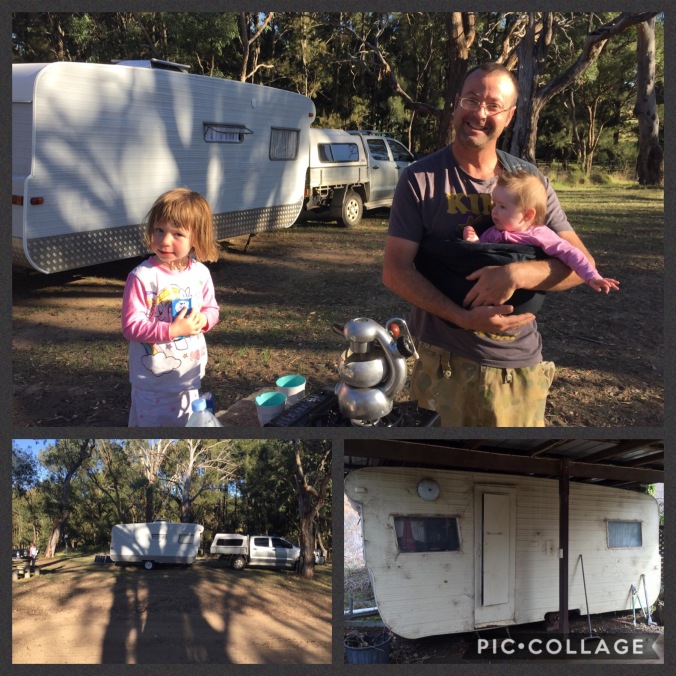
Test run!
Adam had gone to a river camp nearby sometime ago and thought it would be a good place to go on our first adventure.
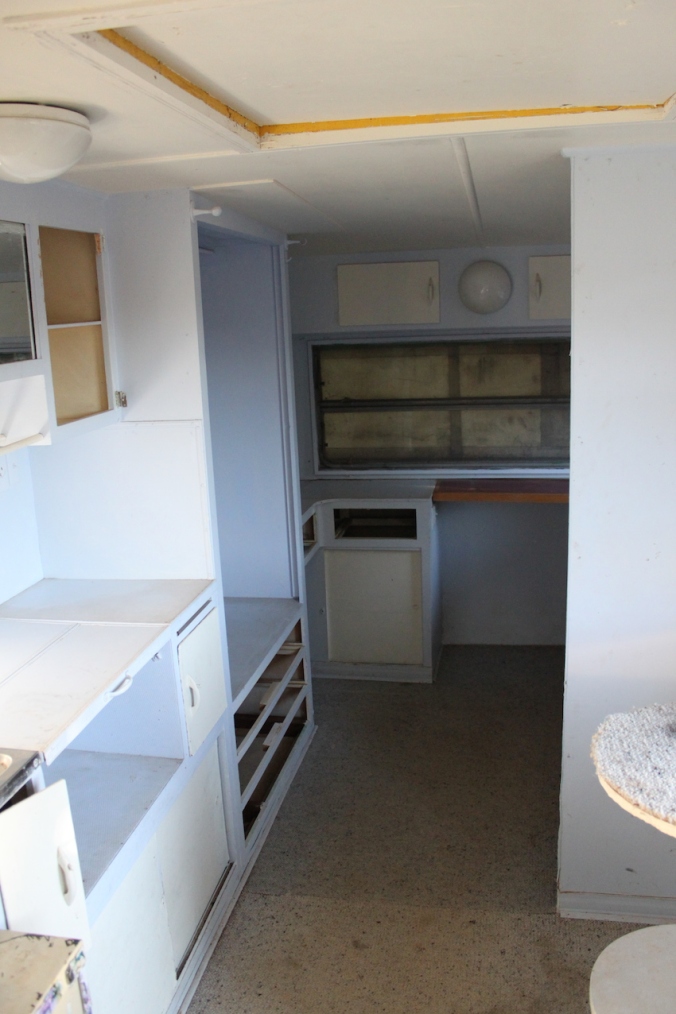
the inside of the van isn’t 100% complete but we wanted to see how we went to know what we Need to do before our first big holiday for Christmas.
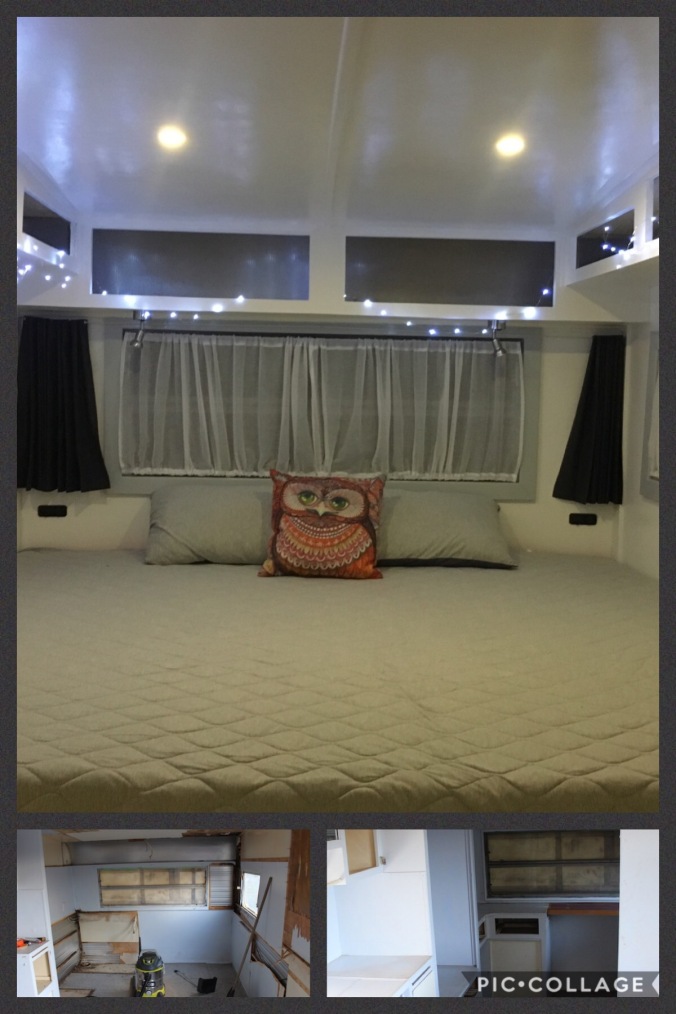
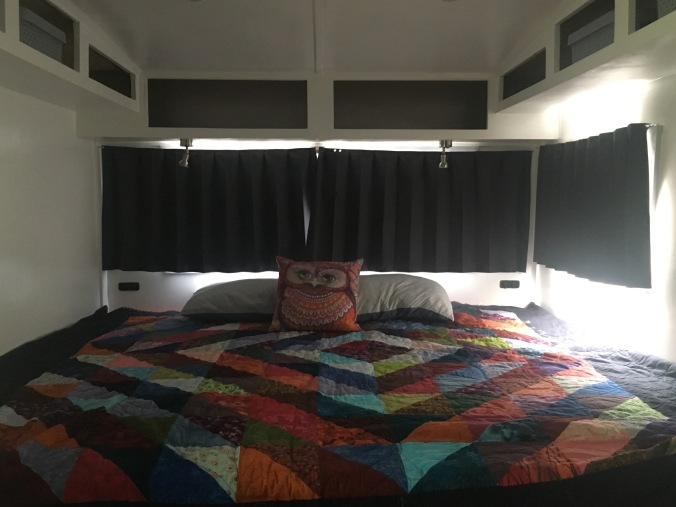
The main bits are done…. our bed. 2m long by 2.5m wide. I’m calling it out super king. With a 3yo and a 5mth old it is likely we will all end up together.
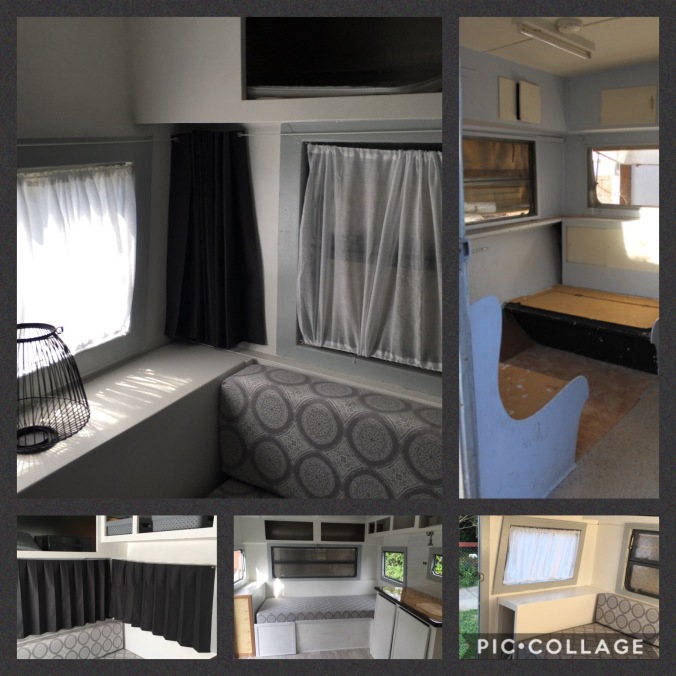
But in the off chance someone wants a bed for themselves (really it is designed for the toddler) there is a full size single bed that doubles as our lounge.
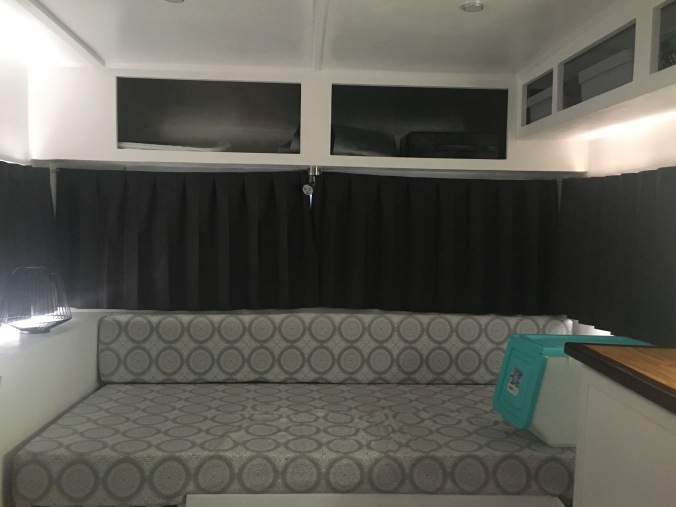
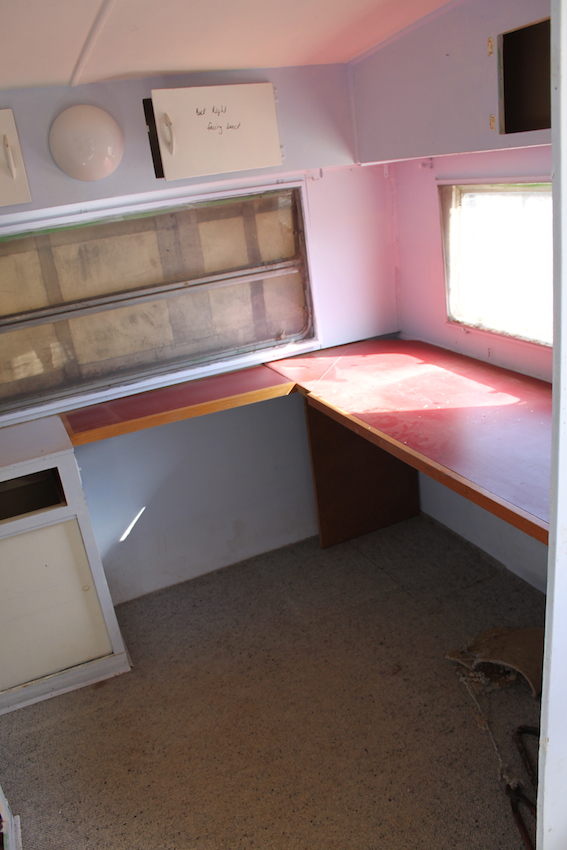
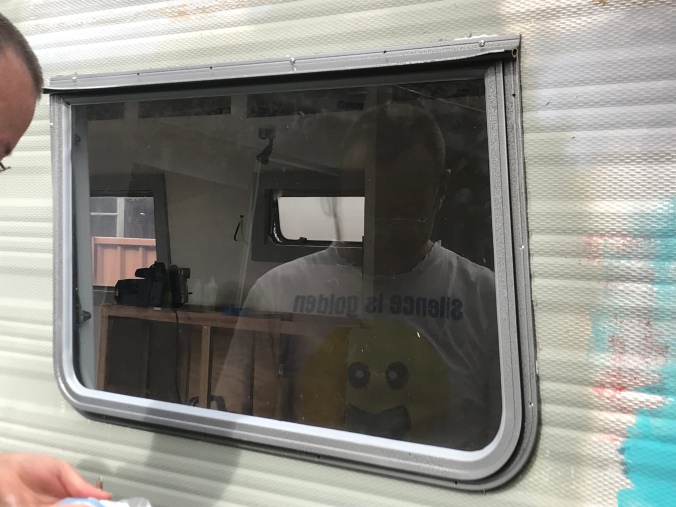
In the picture above you can see the blockout curtains open. I designed them to bu unobtrusive when closed as you can see in the image below.
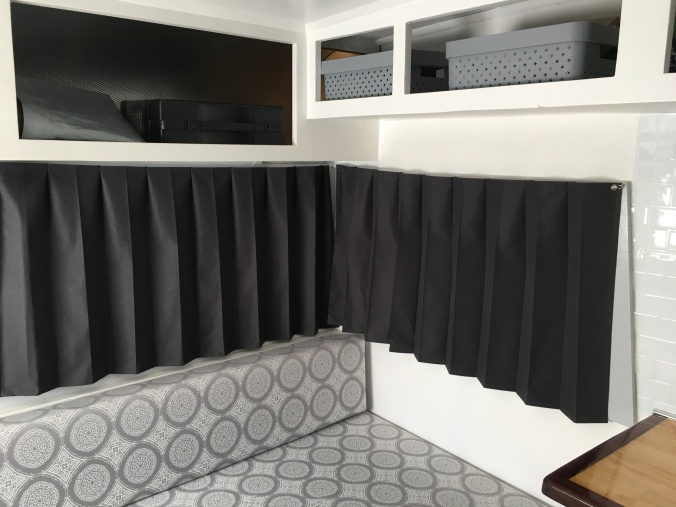
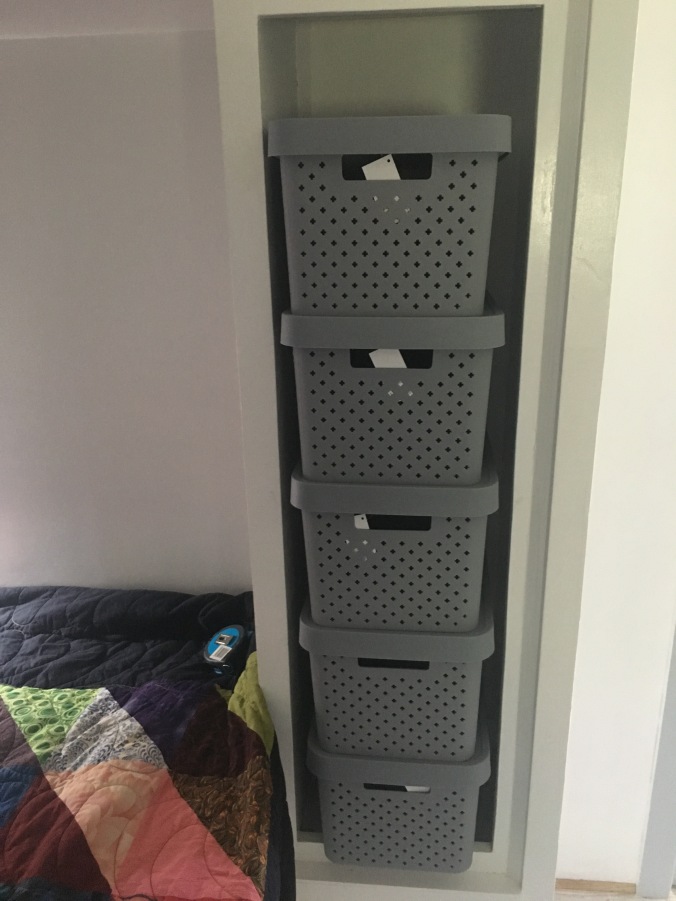
I went to Kmart and and got a bunch of plastic baskets to help with organisation. Whilst not fitted properly yet you can get the idea. In the tall cupboard below we will add shelves for each basket and spring wire with hooks and eyes to keep them in place when we travel that can be easily removed when we are living in it.
So… now we have had a bit of a look inside it is time to talk about the actual adventure.
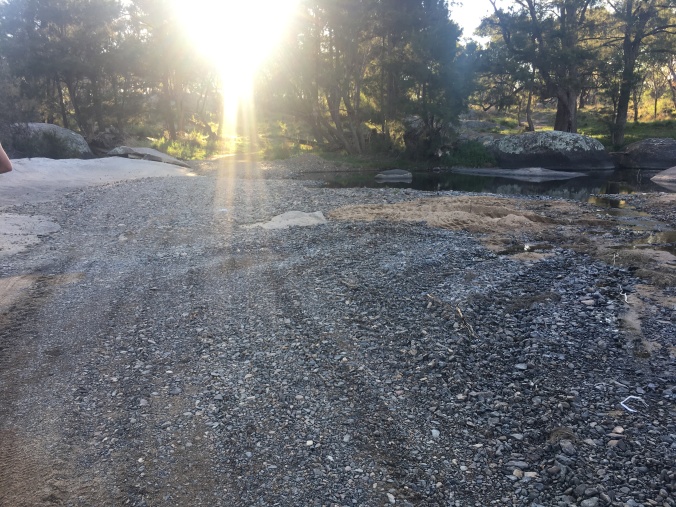
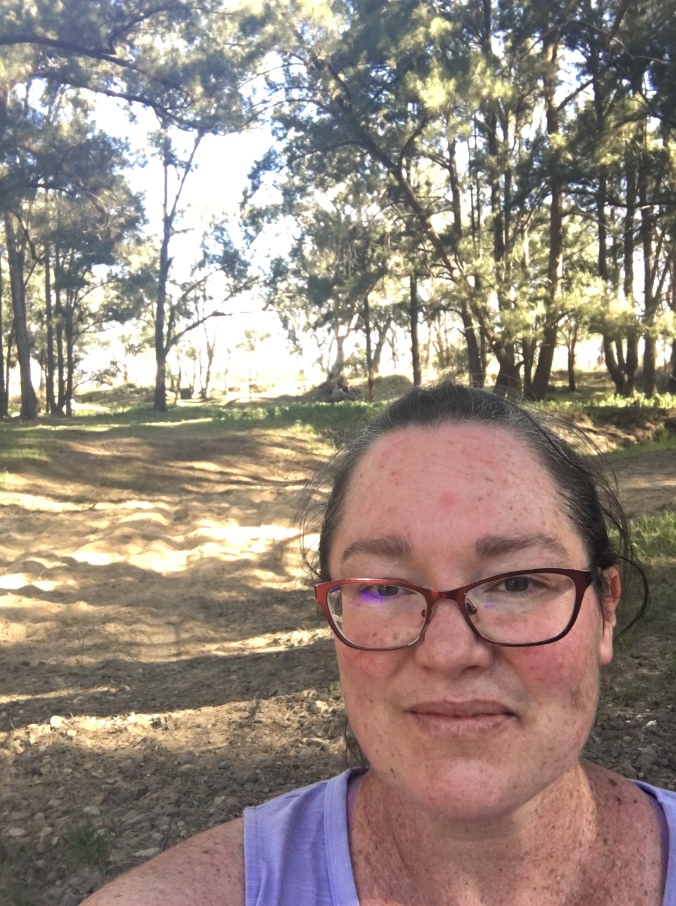
As I mentioned Adam had scoped out a spot for us to go to…. which was MAGICAL. What wasn’t was the drive in. I like to describe it as THE GRAND CANYON!
There wasnt corrigation there were cliffs and nopot holes only gully’s. I found myself gasping… so I decided it was time to sing to the kids rather than visualise the van toppling I’ve taking the Hilux with it.
When we came to the wet river crossing I had to suggest we do a walk over first …
doesnt look too bad says Ad.
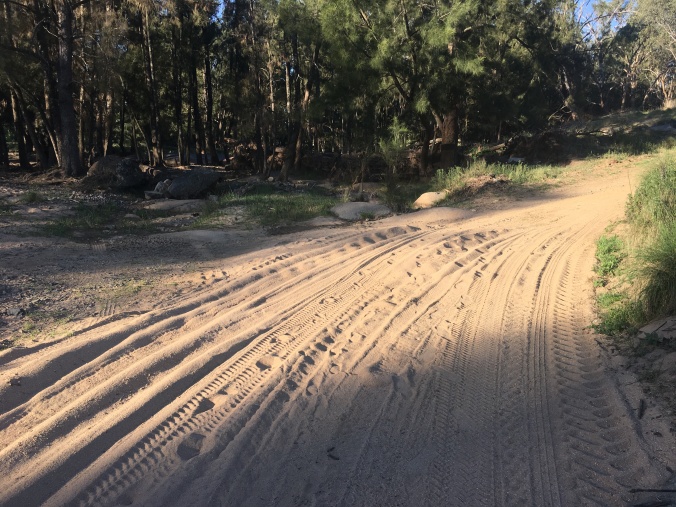
Not so bad… but remember it is our FIRST EVER trip in our van.
The thing was we could see the camp ground at this stage. And it really was magical!
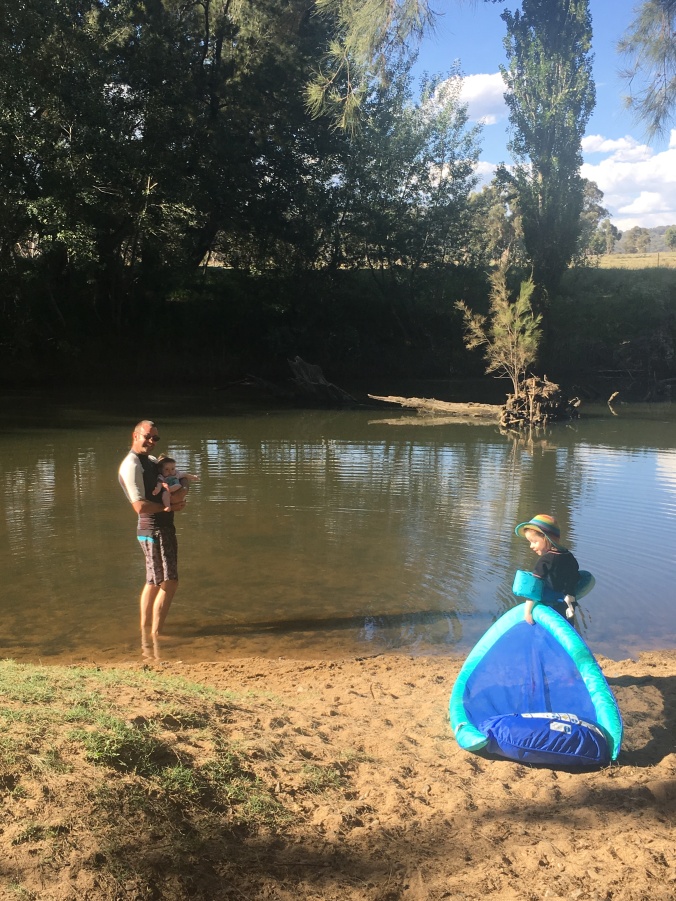
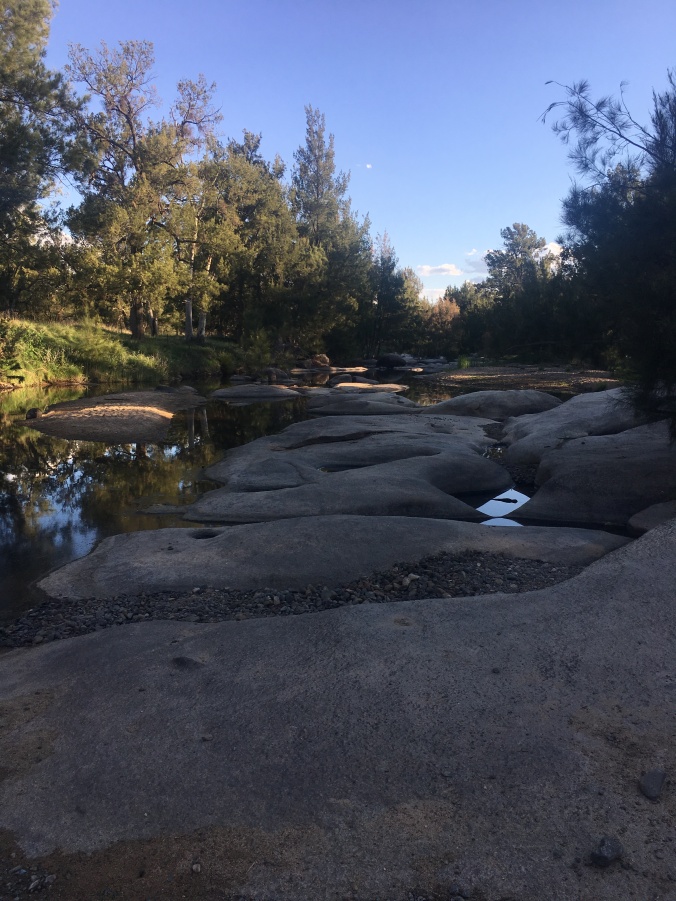
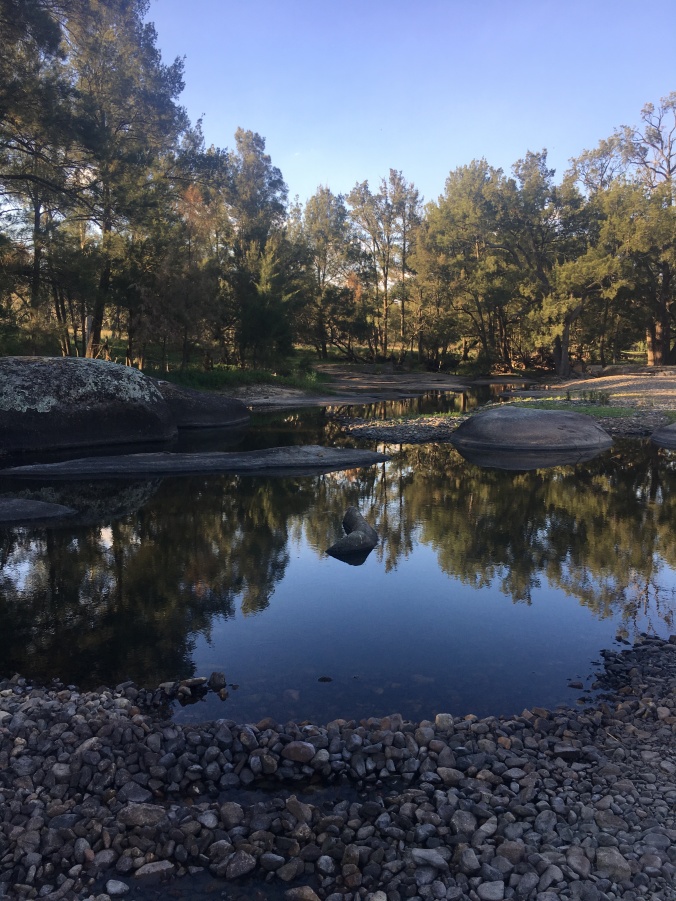
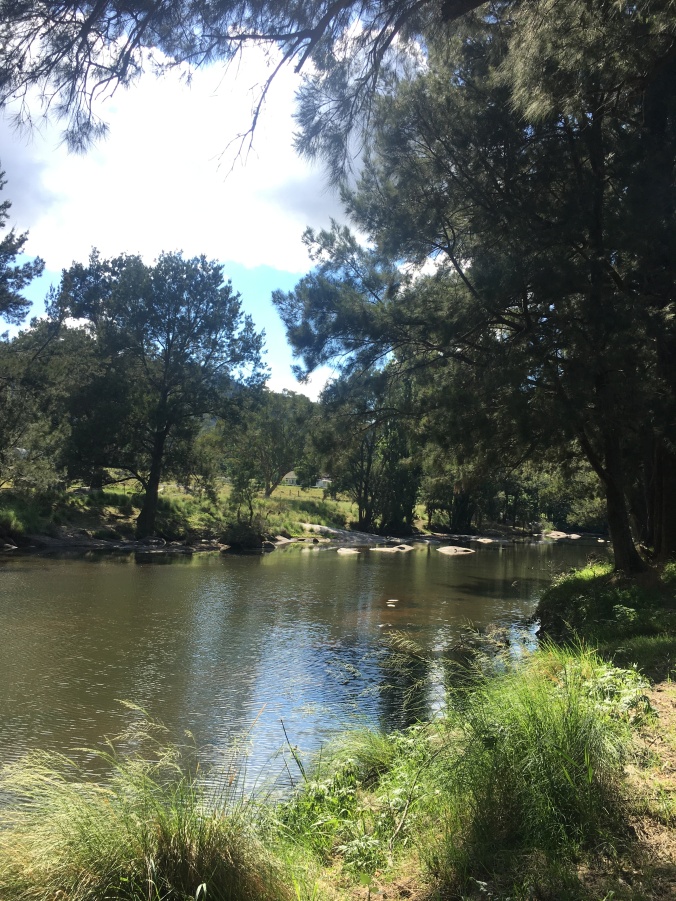
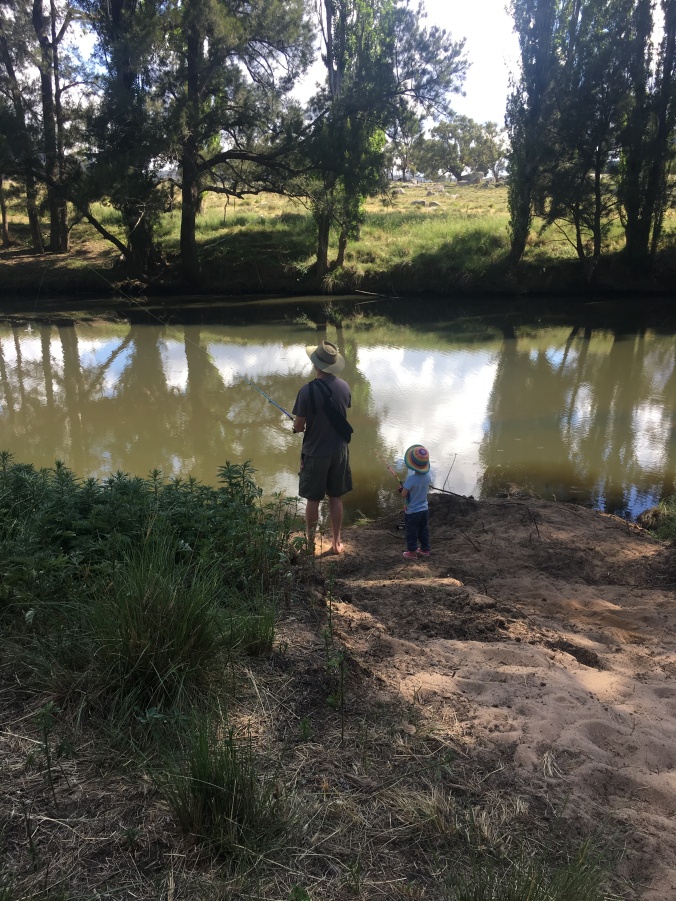
There was even a platypus frolicking in the water putting on a beautiful show.
We didn’t bother with the annex, the van had everything we needed for her first test run. The fridge was cold the bed was warm and we were all there together! We even gave the porta potty a run. Worked perfectly. I wasnt looking forward to trudging outdoors with the toddler at three am and I didn’t have to! It was even easy to get both kids to sleep!
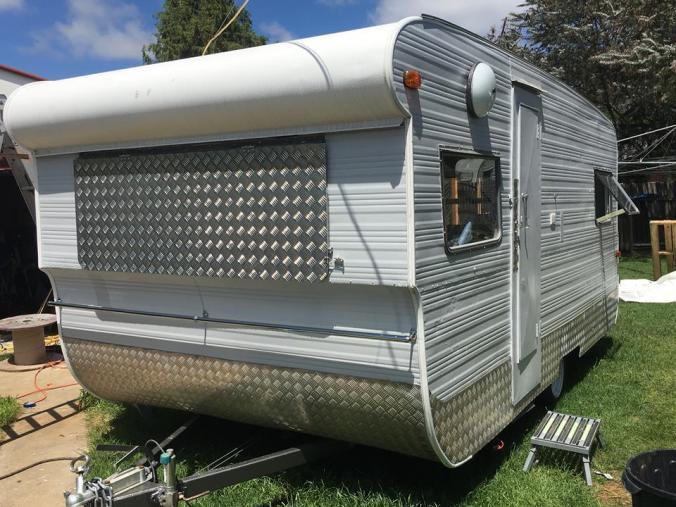
The very first of many fantastic adventures we hope to have in our not so Pumpkin Princess!
Till next time
S&A
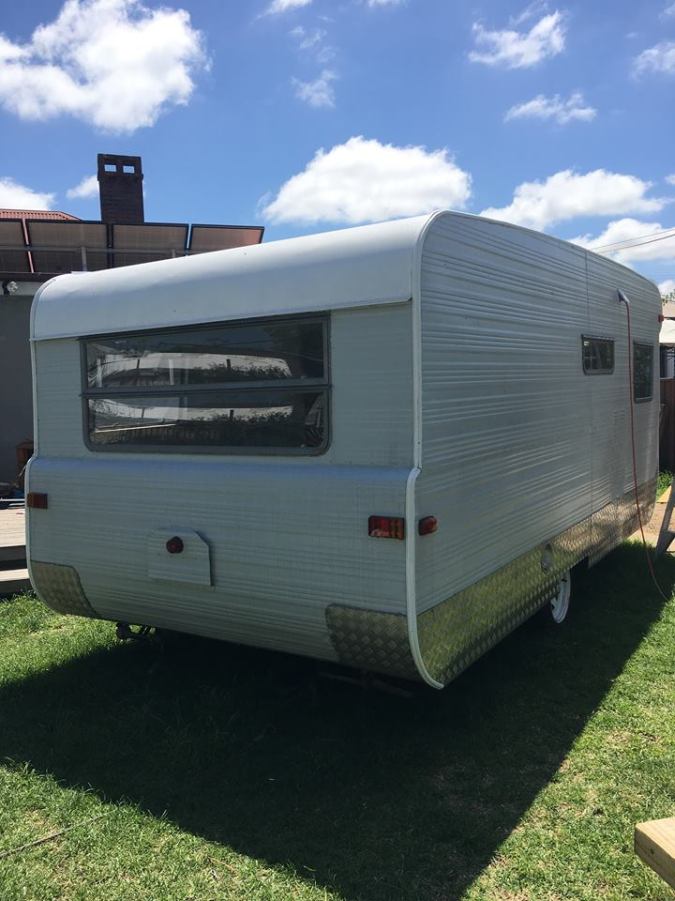
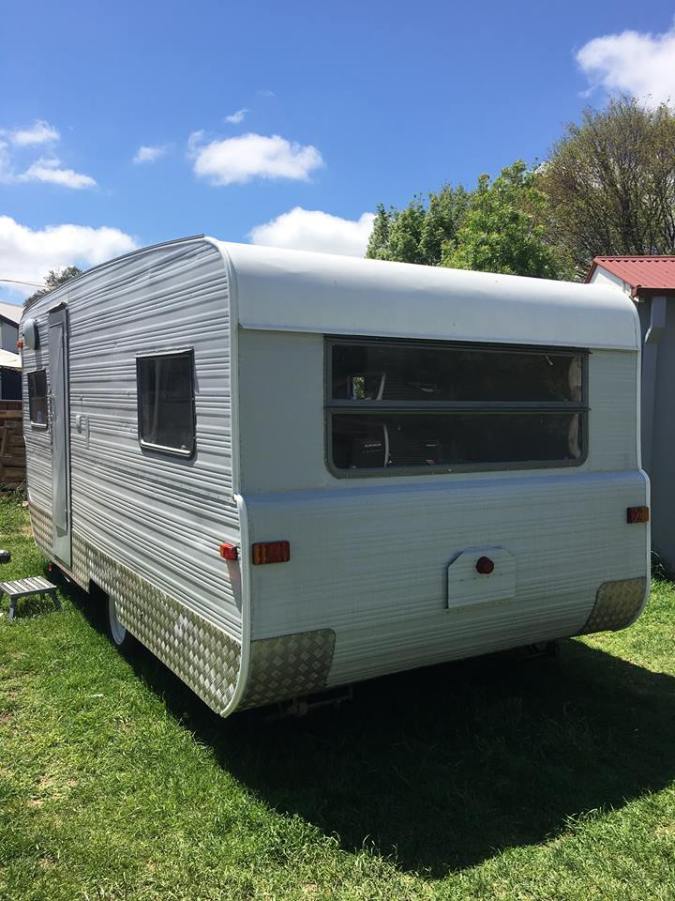
Registration
It turns out this post is a little hard to write. It feels like the end of an era!
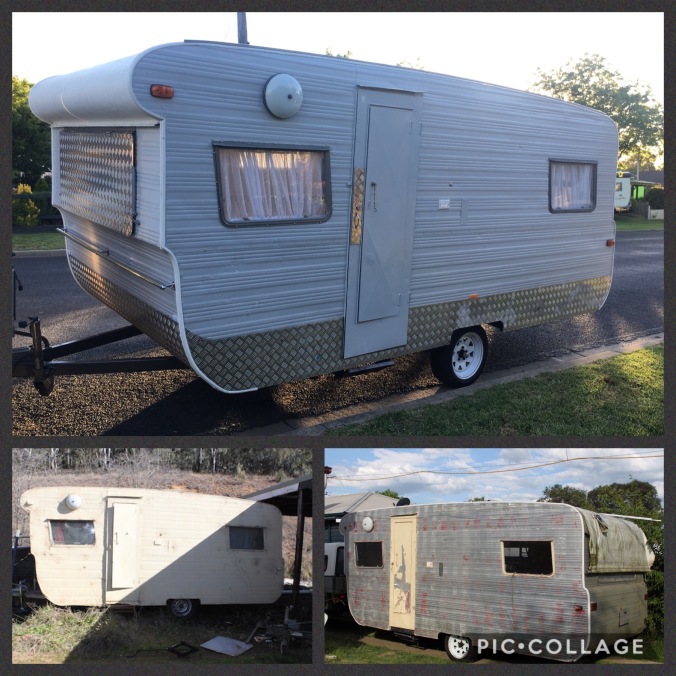
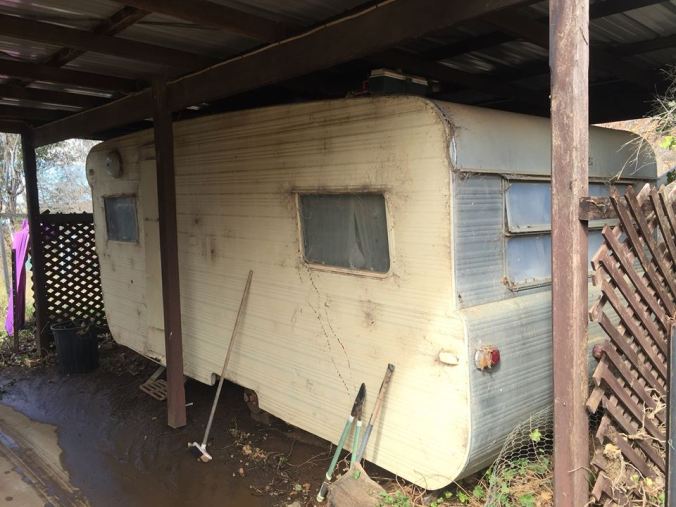
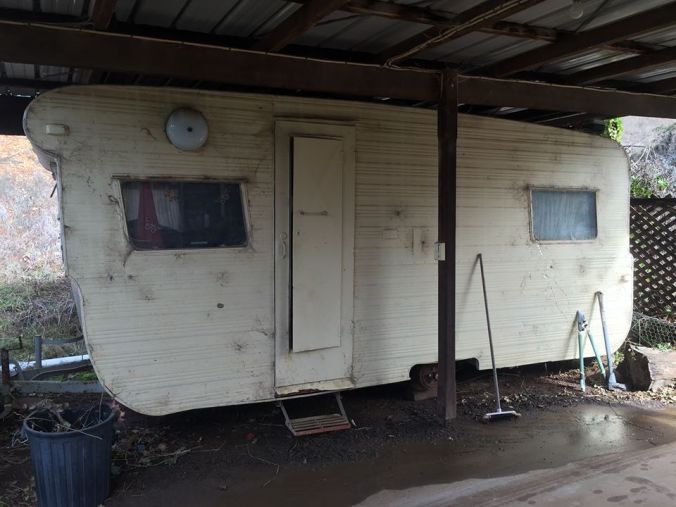
In July 2015 Adam and I were given a caravan from a dear friend of mine. In truth she hated the van and was very happy for us to take it away. Her one stipulation… we could never take it back!
Done deal!
It is now November 2018 … 40 months later… and she passed rego! Woohoo.
The biggest disappointment for us? No one asked to look inside! No one, bar us, has seen her transformation! Well us and anyone who has scrolled through the pictures in this blog.
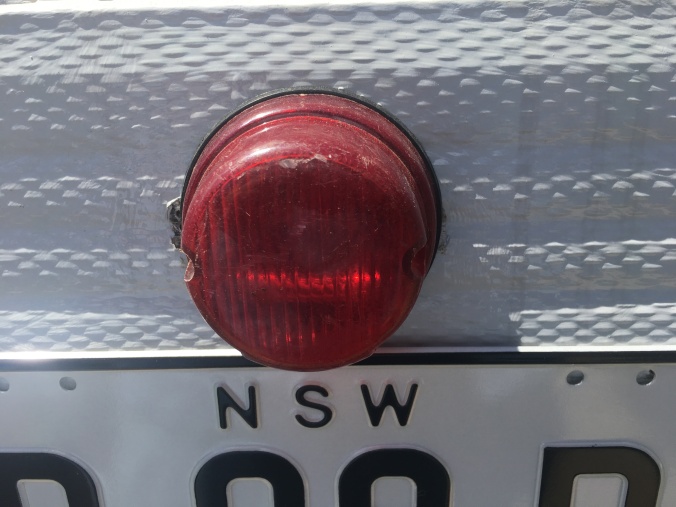
So… to get her registered in NSW we had to have a weight certificate, a blue slip, proof of ownership and of course the actual rego.
I went to Services NSW to get the unregistered vehicle permit (UVP) only to be told that any movement required for rego is ok to do without a permit. Bonus. So we hooked the Pumpkin up and started the journey to the weigh bridge. Five kms later we discovered our van weighed….
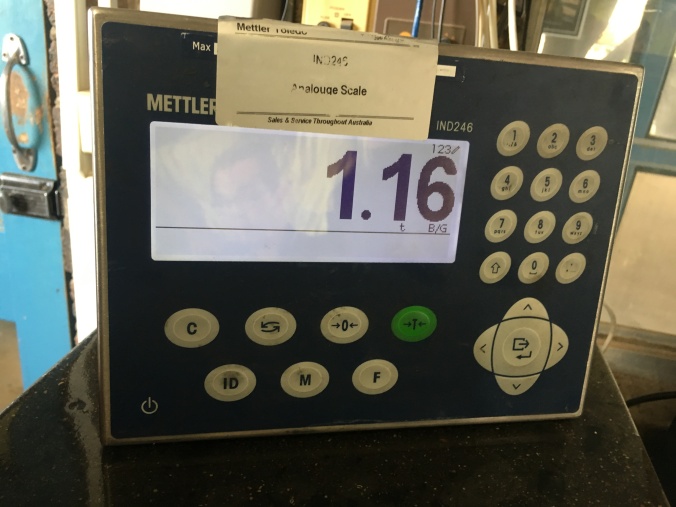
1.16 ton! 😮
where is all that weight?!?
Home again. Geepers.
Our small journey highlighted the need to raise the old girl a bit. Time to consult the Facebook group brains trust. Leaf springs under the axle it is.


Before and afters.
The next morning we had to take her off for a blue slip. Nail biting. After all our work, will she past the test.
Turns out, no.
We had to add reflectors to the front and sides of the van. $6 extra! And that was it. Drove directly to Services NSW and 20 minutes later I was holding her new number plates! I paid a few extra dollars to get the black and white ones. I thought the yellow might look a bit average.
Now that she was registered it was time for a test run. But for that you will have to read our next post.
Till next time
S&A
More Princess than Pumpkin
It amazes me when I look back at all that has happened with this little Millard caravan.
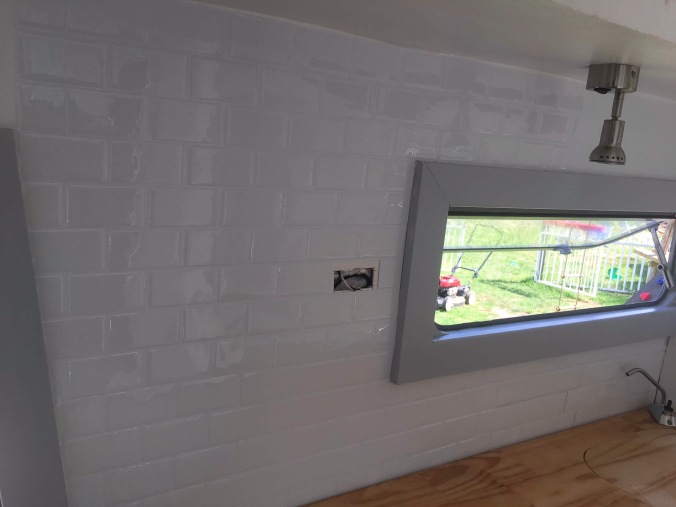
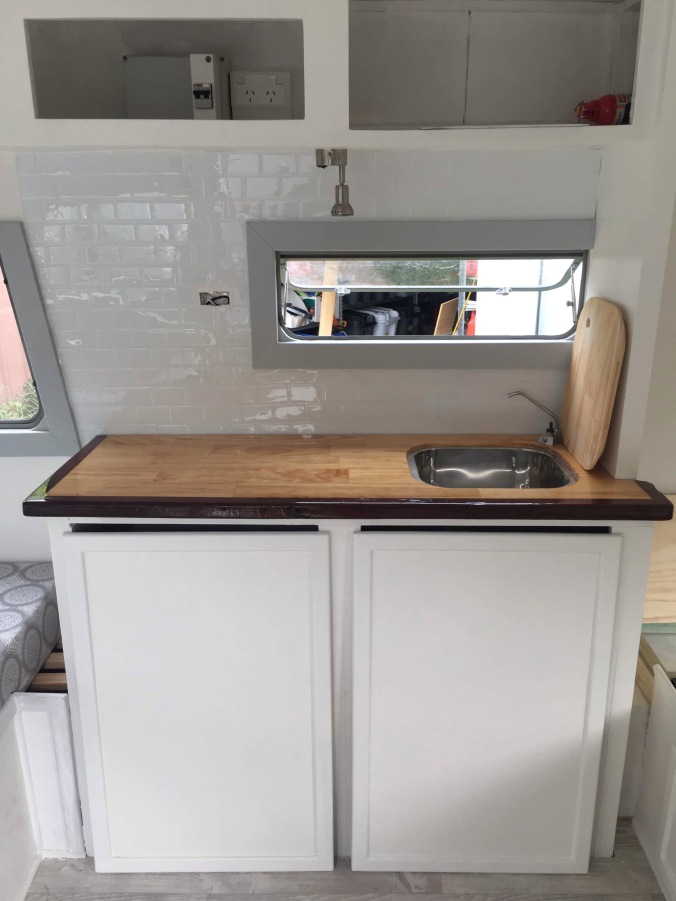
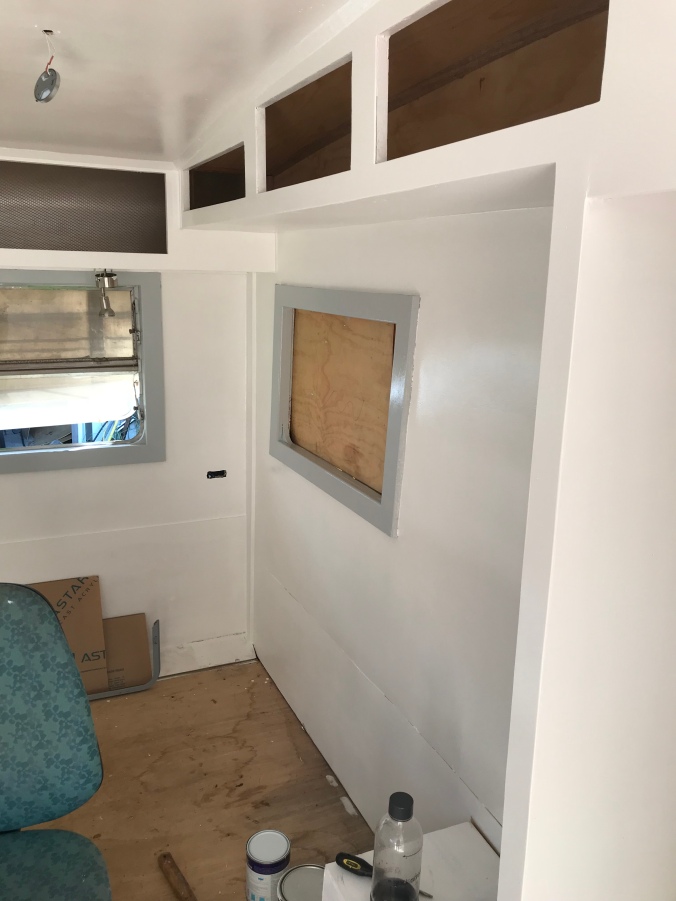
Over the last week or so we have been adding the trims and painting… there always seems to be so much painting for such a little space! The other thing I got to do was ’tile’ the splash back.
Because of the weight of real tiles we opted for white subway tic tack tiles… they are so simple, you peel and stick. They are a sort of 3D with what looks likes a silicone filling. There’s are numerous designers of tile you can get but this is a link to the style I got. They were easy and fun to put in.
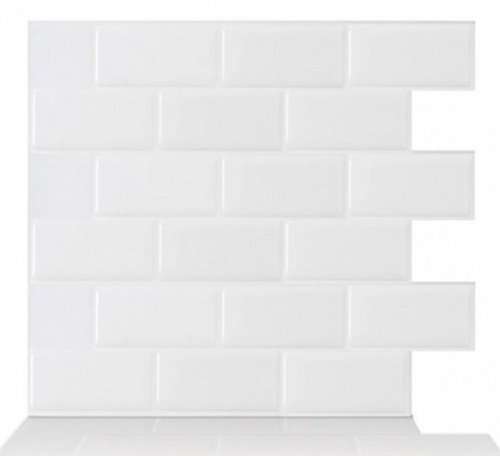
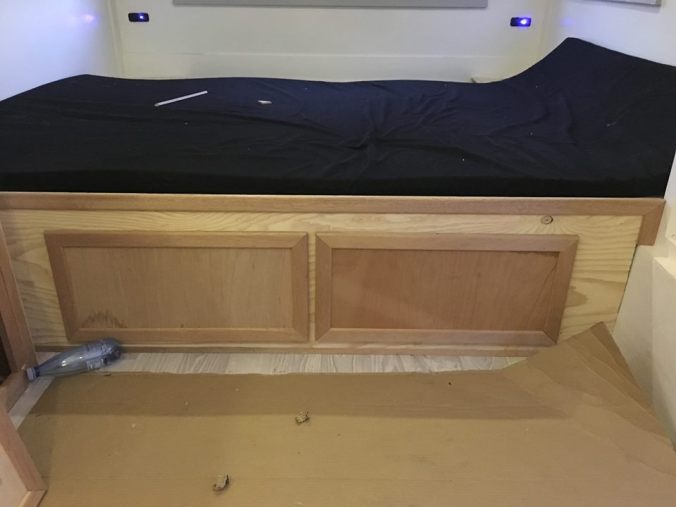
Below you can see us Auditioning the tiles with the bench top and the raw wood doors, then the white primed doors, the tiles and eventually the current condition. We have yet to add the hinges to the doors and runners to the drawers.


It is to me, quite amazing how much I enjoy doing all things van related. It has been a wonderful project to work on together. In the time we have had this little pumpkin our family has increased by two… and all things going to plan our little family will be enjoying a wonderful summer holiday in our little princess!
Stay tuned,
S&A
oh so close!
We have been spending more time working on our little pumpkin… turning her into a princess ready for our big holiday adventure for Christmas.
sneak peak of her transformation…………….


Hubby has worked like a boss on the van … we were missing the stone guard/window cover … Checker-plate… yes please! A perfect match for the checker-plate on the lower stone guard.
The addition of a towel rail on the front makes it that much more family friendly.

He then added checker-plate along the sides and curved it around the back to give the van some nice lines! And that fancy flash back window! perfect perspex.
Potentially more exciting is what is happening inside!
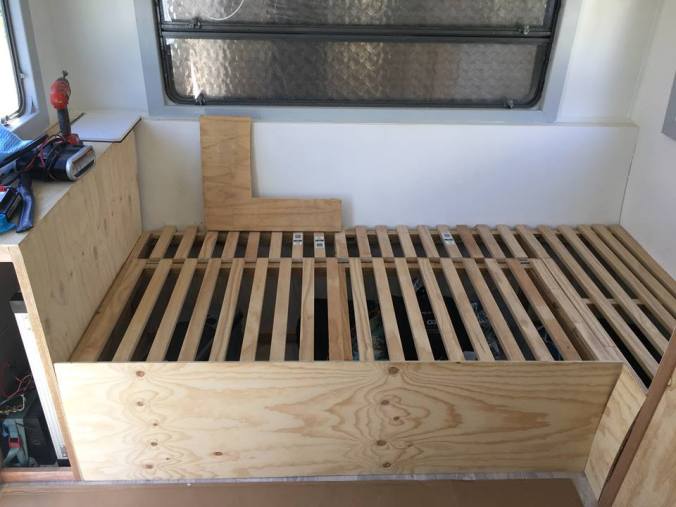
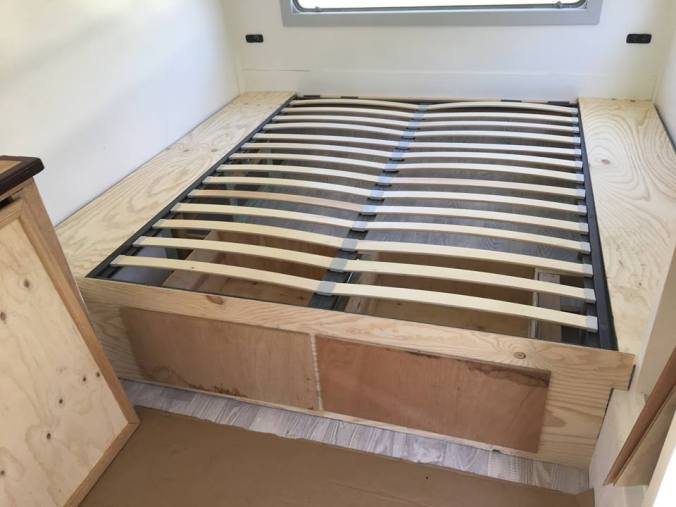
To the left of the day bed we now have a cupboard that houses the batteries and the solar panels which should give us power to run our little set up for a week… well for however long the sun dictates really! We also have the undressed basic ply that will form the skin front on the day bed base..
Whilst the ‘seat’ lifts up on hinges we will be adding a door on the left side of the under bed that will hinge left and a drawer on the right. The whole unit will be framed… like the ones below.
ok so maybe not in this picture.
Like above the bed here lifts up and the two solid sections life up towards the sides of the van. This will in essence give us a bed that is 203cm long (standard king length) and 246cms wide – not standard… good thing I can sew a set of sheets!
As you can see we have made two drawers on the front of the bed for our frequently accessed items. I can’t imagine I’m going to want to lift the bed every time I want something from under there.
As you can see in the following image the framing starts to make things that more schmick! (not yet complete)
The plan is to keep working on the framing and finishing …. once the kitchen is made.. the painting will start!
Stay tuned…
S&A
oh … and just as a reminder… where she came from…
Awning/Annex
So it has been another long pause between posts for our little project… and for a while work has all but stopped… but in that time we welcomed Delilah Seraphina into our lives. It seemed only right to take some time and get to know her. Well that and sleep deprivation!
Anyway new baby aside we have been taking small steps to get the Princess ready. Our aim is to have her ready for a significant stay away at Christmas time. I figure in Australia, no matter where we go we are going to need significant shade… therefore work continued to get the awning/annex complete.. or a significant way to being complete.
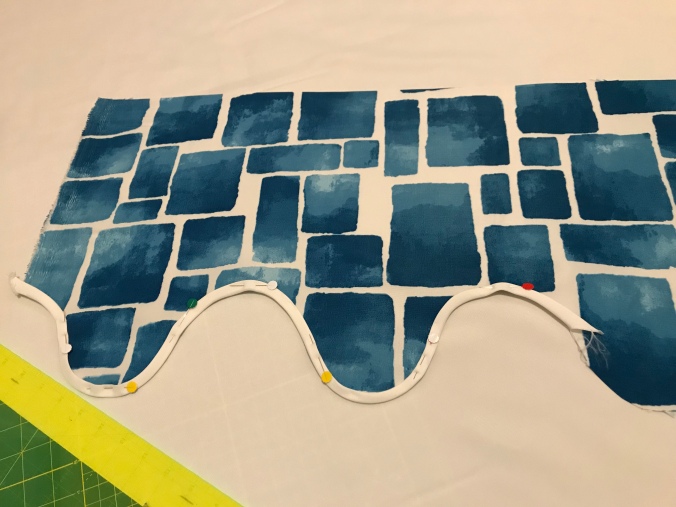
As I mentioned in my last post I had purchased a heap of fabric pretty cheap. I made a ‘wave’ template and cut edging for the awning. I then made bias tape and edged the wave. I cut and joined a few strips using french seams and metal eyelets.
Extension poles and ropes and today, Fathers Day, we threaded the awning onto the c rail that we attached to the top of the van.
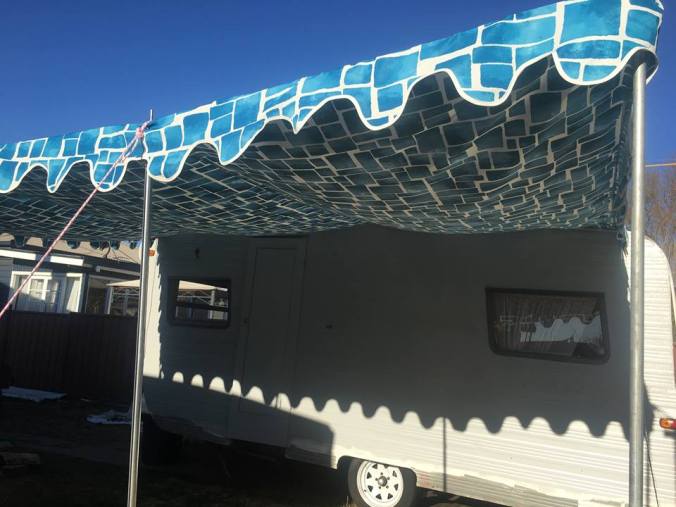
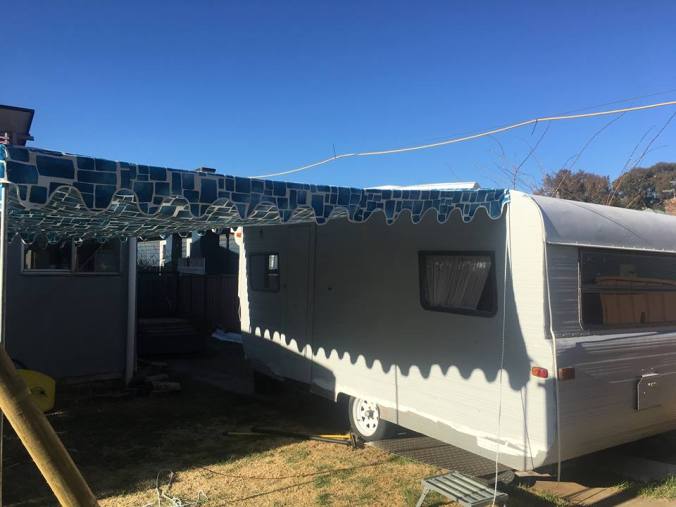
I had purchased a while ago for a different project some ‘join-able’ while walls for a gazebo style tent.. today we tested them out with the awning.
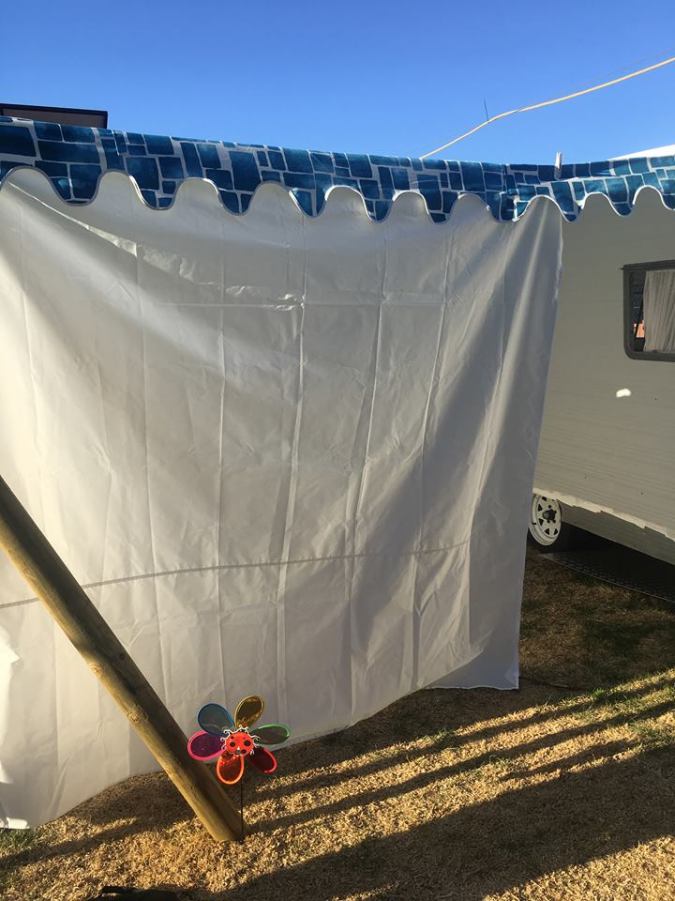
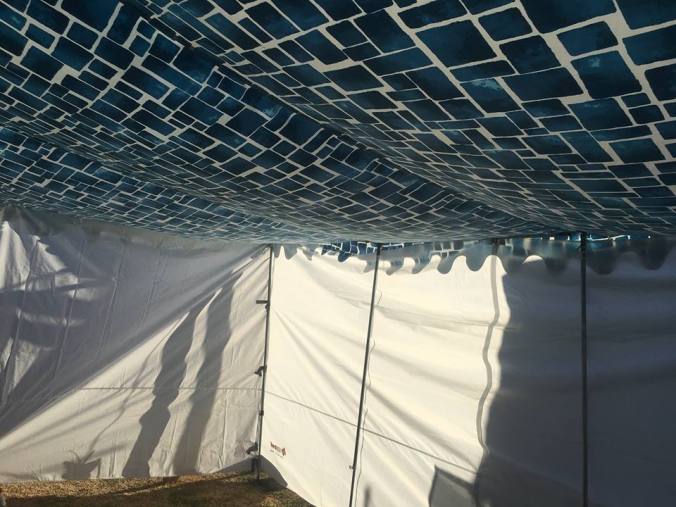
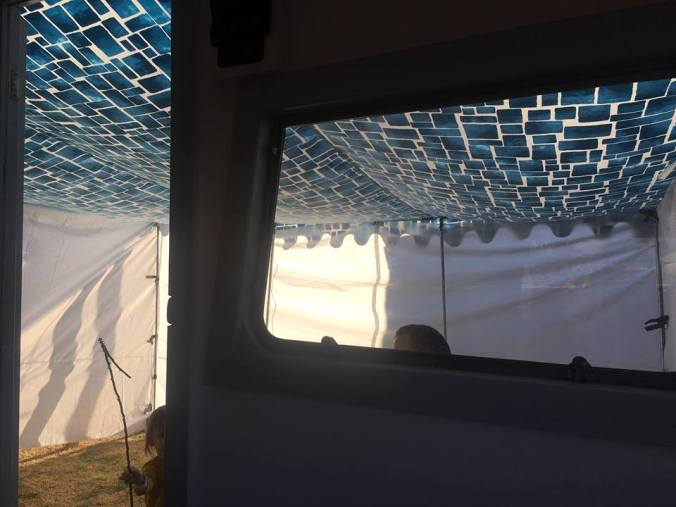
With a few minor alterations the walls will work quite well to make a more secure annex area.
I’m very much hoping that we can have a short get away in the van before Christmas just to test things out. But even if we don’t… I am super excited for this next adventure!
Back soon..
S&A
An update on our progress
Hmm where to start?!?
we have now painted the inside of the van. This was no small feat for a 7 months pregnant woman! As we had used raw 3mm ply we started with a three in one primer sealer. That was a pretty huge day as the paint was thick and the ply thirsty, but I got there in the end. I then gave the inside two coates of high gloss white.


I also decided to go with a high gloss pale grey around the door and windows.
Next it was time for me to have a little rest… so I decided to do some upholstery… out ‘lounge’ is also a bed, so we decided to go with a single size. Trying to be thrifty I purchased a 6” queen mattress from fantastic furniture… and the cheapest electric knife I could find… a $20 jobby from Kmart. I had read that the electric knife was the best way to cut the foam. It really did work a treat but it was still a bit of a pain to cut. I got there in the end!
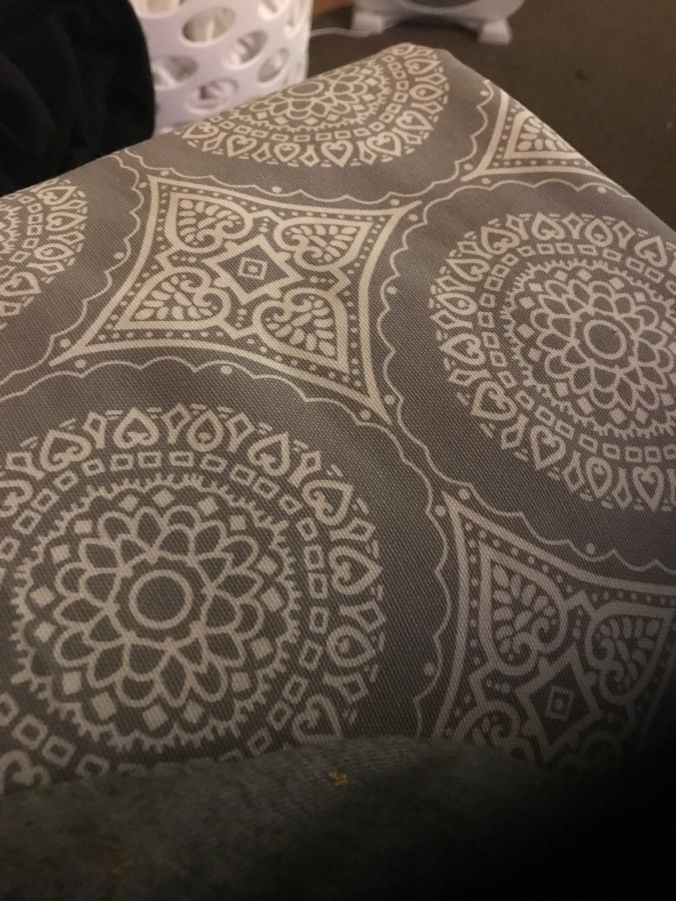
Sticking with the thrift idea I waited until there was a 40% off sale at lincraft and picked up a grey and white canvas to tie in with my paint scheme.


While I was busy sewing inside Adam was doing the super tedious task of cleaning the window frames and replacing the old glass and Perspex with new Perspex!
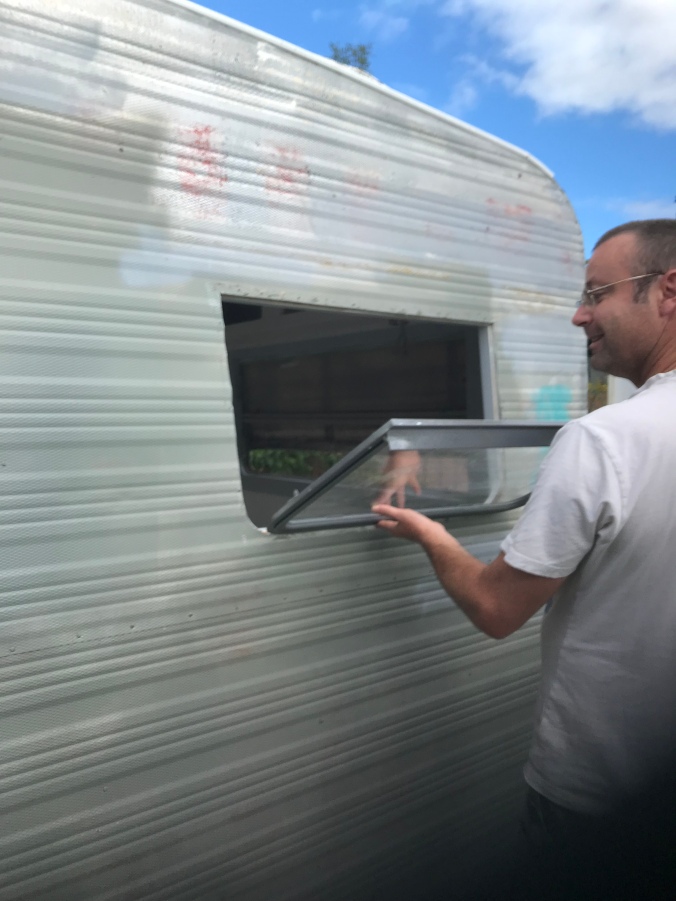
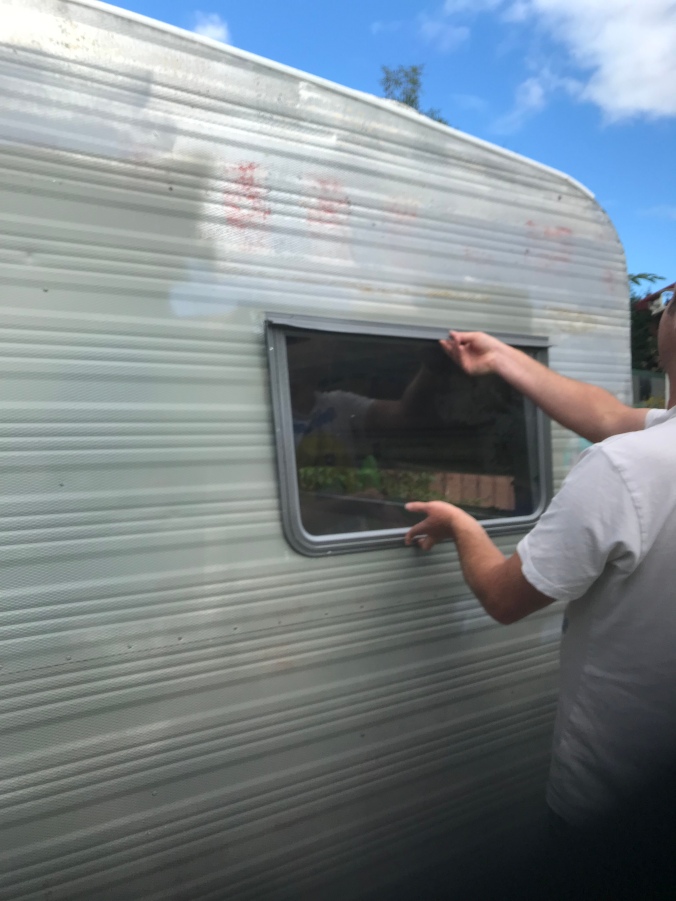
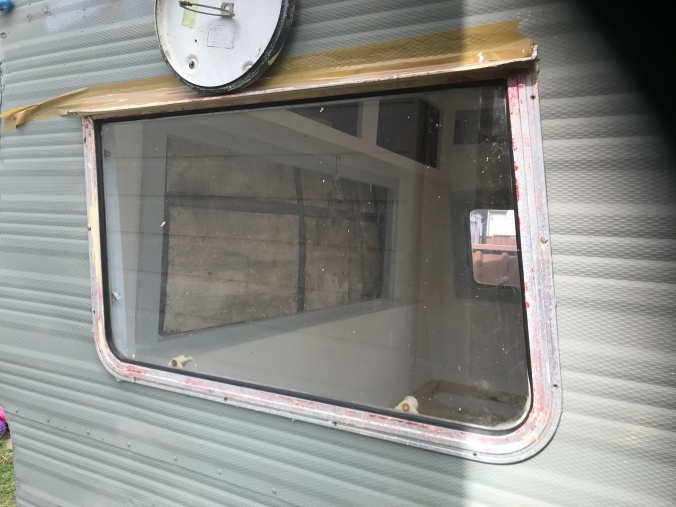
You can see the scabby old frame in this last picture above. The new look frame has been painted in a hammered finish gun metal grey.
Having now done the majority of the day bed cushions I turned my attention to Lino. I picked a Nordic white Lino from Bunnings. I have since learned I probably could have saved s lot by looking into flooring shops… oh well we live and learn.
Now at 7.5 months pregnant I thought long and hard about how to best fit the Lino. In the end I settled on a full paper template. I could then roll out the whole sheet of Lino on the deck and take my time to Cut it just right. I must say, I surprised myself at how well this worked.


I left excess at the front and back to roll up the curve as you can see in the last picture.
We stuck the lino down with some thinned out liquid nails and I have some decorative strip edge to add to places where it will remain exposed after all the built ins are added.
Getting bigger by the day I decided it was time for me to move back to soft furnishings.
Adam set about sorting the roof vent and scraping all the crud and crap off the roof… in hindsight we should have done this sooner… but the heavy canvas tarp we had in it hid a world of hurt up there. It is as they say, out of sight out of mind.


The old hatch (first pic) was replaced with the last pic, the four seasons hatch.
Unfortunately I don’t have pictures Of the roof work, but I will get some and make a post soon.
So, soft furnishings… trying again to be thrifty I looked at spotlight and lincraft for a grey block out fabric, unfortunately I couldn’t find Anything but I did find some fabric that he’d the colours I was working towards. These may change but will do for now!
Luckily I was able To find the mechanisms to make my own roller blinds for $5 instead of the standard $15-20 each.


Next in my list was the awning. After doing some google searching and looking at fabric shops it looked as though an annex might be a bit in the $$ high side.
I would have loved to find a UV stabilised canvase in a white and teal strip. Alas I couldn’t find that in my regional town but I could find two kinds of stripe I didn’t mind.
BUT they were $29 a metre – reduced to $18m on sale. Needing 10m wasn’t going to be throw-away cash if I stuffed it up.
Then I found a fabric, UV stable, for Outdoor use, water resistant not proof… but on a clearance rack for $6m. The shop lady told me if I got the roll she would sell it to me for half price! There was 13m on the roll. At $3m that was acceptable loss if I stuffed it! Again not my ideal fabric pattern, but would do just nicely for now.
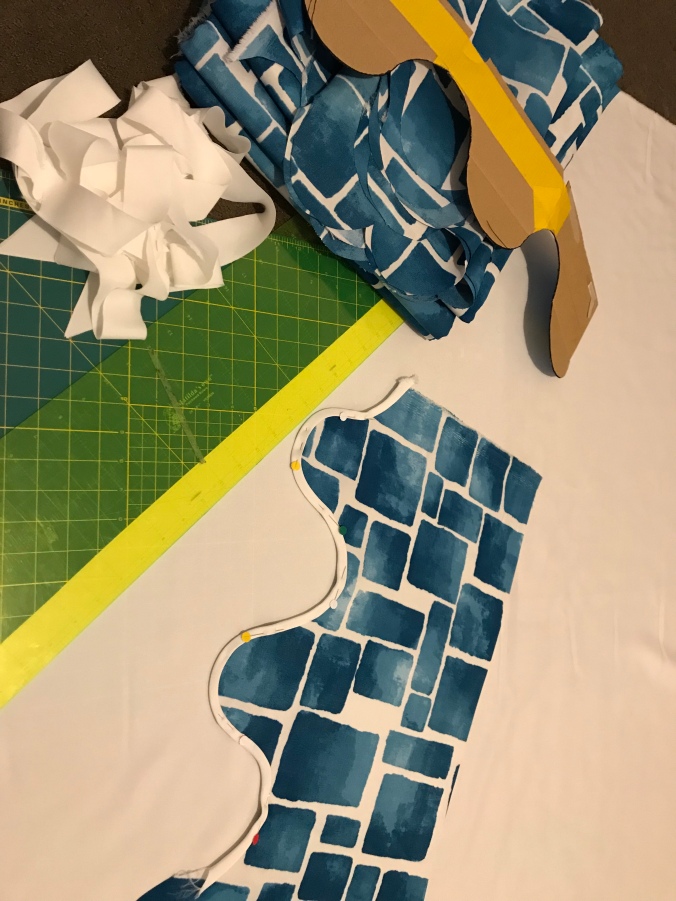
I made myself a curved template from an old nappy box, and cut off enough strips to go around three sides. I started to use store bought bias tape but it didn’t have the same quality or flexibility… so I got some matching white and gave begun cutting stitching and pinning. The image above is an example.
Adam spent this weekend adding the water tank and getting the plumbing sorted.
At this rate we might even get this van on the road this year.
Tomorrow I will be 8months pregnant. Almost time to stop work and prep for the babies arrival.
Fingers crossed we can have a nice family holiday in the van sooner than later!
Thanks for reading,
cheers
S&A.
Update pictures
 A bit closer to being done! bed end of the van
 Auditioning feature colours for the exterior
 Adam and Lilith bonding over the Van
 Closer look at some of the top cupboards
 Ugh, the hateful job of paint removal on the window frames
 Sal and Lilith. this could be her own Harry Potter room!
Looking at the inside…
Since the big move (and by big move I mean from right up the back yard to close to the house) we have started to look at the interior of our princess!
I thought I might show a few progress pics so far!

what she looked like when she was given to us by the lovely Ellie.
 As we started demolition.
 (the opposite side – but you get the idea)
 Building up and framing the window
 All framed up.

The actual window awaiting a makeover (my job for tomorrow after we go blackberry picking!
 The outside of the above window
It is currently covered in plastic as we wait a summer storm.

So this is the view standing at the door looking towards the back when we first got her.

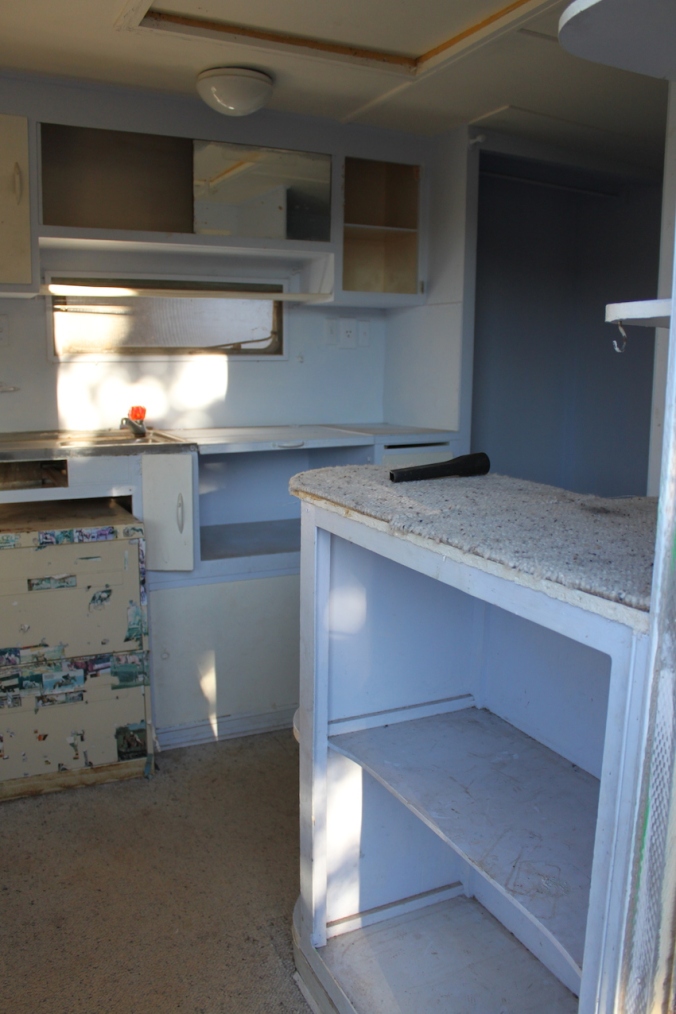
The same space less a few cupboards!

A closer image of where it is at now…

With the lights on… all 12v.
the left hand side of the back with some of the upper storage space.

Looking back towards the door – the boxes at the base squaring out the wheel arches, and a bit of storage space – and structural support.

The forward front window with the frame on. Makes such a HUGE difference. I don’t know why I doubt Adam… we just have such different ways of looking at and doing things. He really is very talented.
Fingers crossed tomorrow isn’t TOOOO hot, and we can get some more done. It is getting so close to painting I can almost smell it!
Well enough for now. Till next time
S&A
Time keeps on ticking, ticking, ticking into the future….
Well, it has been a long time between posts, but it seems fitting to put something up now.
In October 2015 we welcomed our daughter into the world and thus came to a screaming halt the work on the caravan. Now our little toddler is keen for adventures – and so are her mum and dad! Therefore the spark for enthusiasm in the caravan has been renewed!
So where are we up to?
Adam has stripped off the paint from the exterior of the van – well most of it. It appears that at some stage in the past – someone thought a caravan painted in stripes would be a cracking good idea. Red and white are my guess….

We have a truck side tarp (not sure what it is really called) weighted down covering the roof of the van till we are confident in her readiness to be exposed to the elements.
The interior of the van, so far, has been completely gutted. The water damage repaired and the lining commenced. This also sparked our need to make a few decisions. How would we maintain structural integrity, whilst fitting with our aesthetic vision? In a word, compromise.
We decided to make the whole back half of the van into a bed for the adults (or an adult who may be lumped with a toddler – and now perhaps a new born! shhh), with a day bed or table and chairs at the front end that would, you guessed it, double as the bed for the other displaced adult or if we are lucky – the toddler. Either side of the king size bed has allowance for some storage for each adult – there is also significant under bed storage – or there will be once the raising platform is installed!
Photos of the inside will come soon!
The other big thing that has happened in the last few days is that Adam has remove, rustproofed, cleaned etc the wheels, axle, brakes and stabilizers. No mean feat in this horrid heat we seem to being slammed with this week. We also made the decision to move the Princess from right up the back yard to closer to the house to encourage work on her. Here are a few pics of her big move… keeping in mind she was winched up the back… it was quite the achievement to rive her out – complete with working lights and brakes!
 Hooking her up to the Hilux
 Connecting the electrics
 First move!
  Lights work!
 Only just missed the deck!
  but what colour should she be?!?
 Daddy having a cuddle with the site inspector.
We are all very excited about how this project is coming along. Our plan is to get her to an ok standard, get her road worthy and registered and look at making her beautiful along the way.
More to come soon.
S&A.
